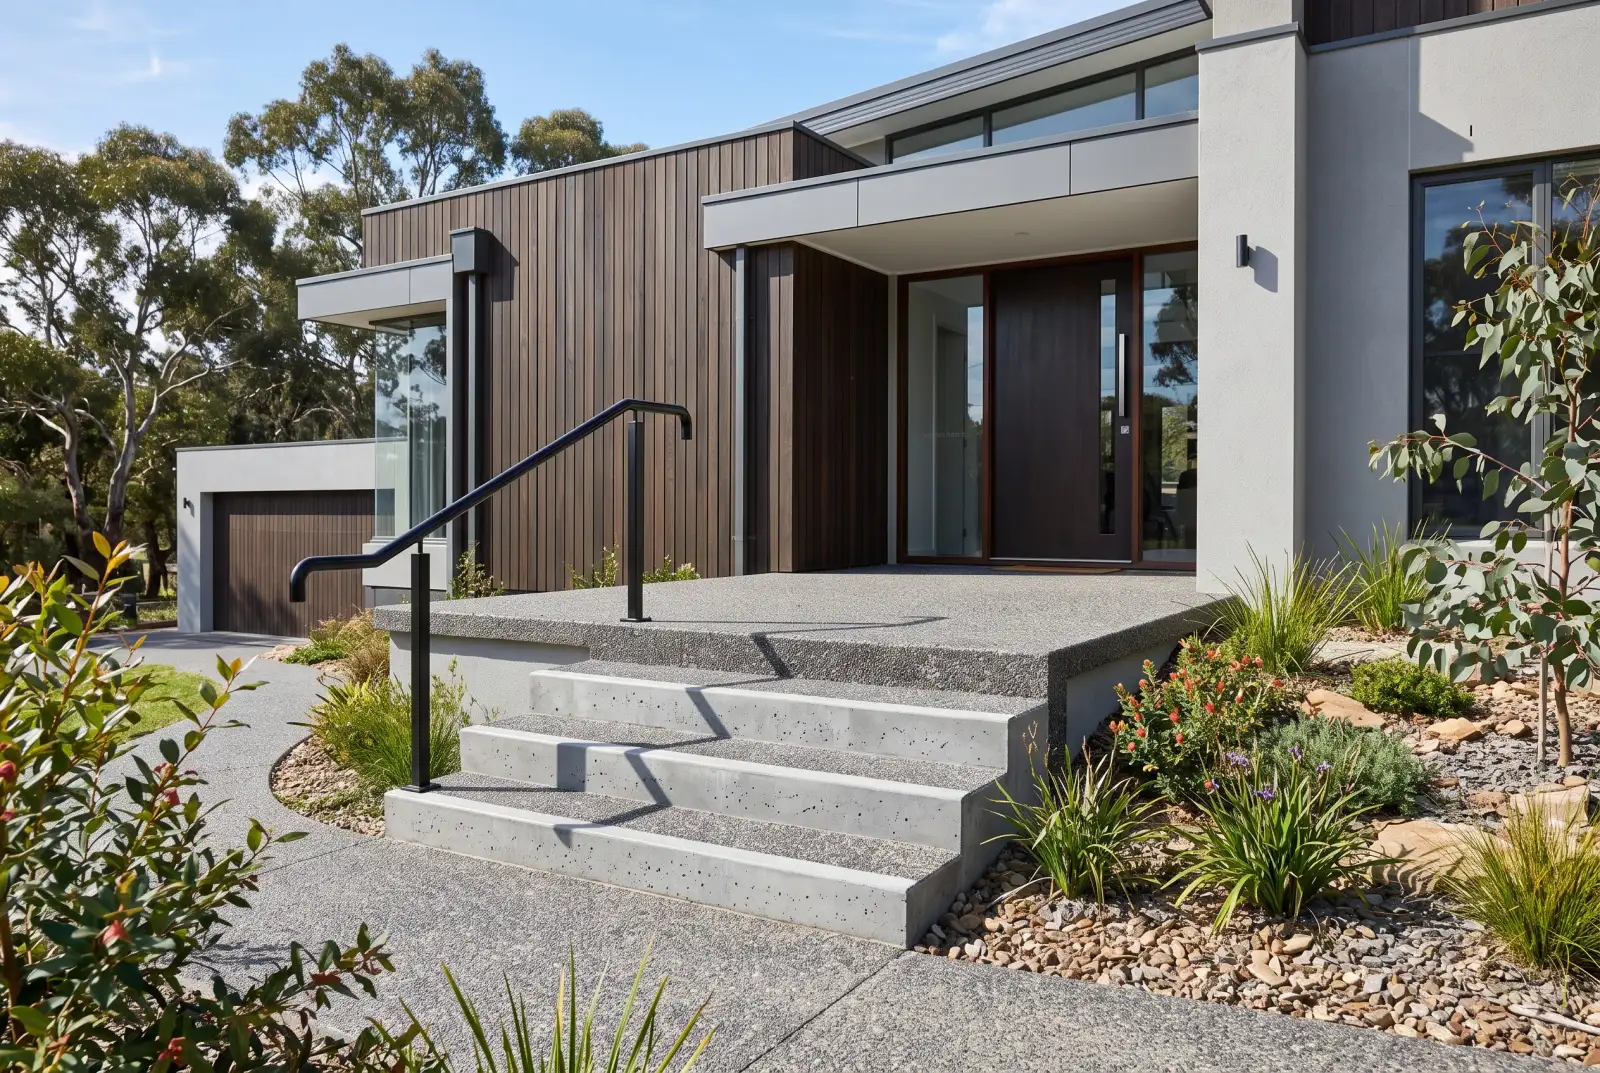
Poured concrete steps are one of the most durable, low-maintenance ways to move people safely between levels — and on the sloping blocks we work across the Adelaide Hills, they earn their keep. Done properly, with the right proportions, reinforcement and a non-slip finish, a set of concrete steps will outlast almost everything else on the property. Here is how we approach the design, the costs to weigh up, and the safety details that matter most.
Where concrete steps and landings make sense
Concrete steps suit any spot where you need a permanent, hard-wearing connection between two levels — entries, paths down a sloping yard, and the gaps between a house, shed, garden or driveway. They are the obvious choice over timber or loose materials when the steps will see daily traffic, carry heavy loads, or sit in a wet, shaded position where rot and movement are a problem.
On the steep blocks common around Stirling, Aldgate and the wider Adelaide Hills, very few homes have a flat path from the street to the front door. Concrete steps let us break a long slope into safe, comfortable runs with landings to rest on. The same applies between a house pad and a lower garden, or up to a shed sitting on its own bench. Common uses include:
- Front and rear entries — a tidy, square set of steps up to a porch or deck.
- Sloping garden paths — steps that tie into a concrete footpath running down or across the block.
- Between levels created by retaining — steps that connect terraces formed by a retaining or sleeper wall.
- Driveway to house — bridging the height difference between a concrete driveway and an entry path.
- Pool surrounds and outdoor living areas where slip resistance and durability both matter.
Getting the dimensions right: riser and going
The single biggest factor in whether steps feel comfortable and safe is the relationship between the riser (the vertical height of each step) and the going (the horizontal depth of the tread you step on). Get this consistent and within sensible bounds and people climb without thinking; get it wrong and every step becomes a trip hazard.
As a practical rule of thumb that tradespeople have used for generations, twice the riser plus the going should land somewhere around 600–650mm. For outdoor steps that usually means a riser in the order of 130–170mm and a going of roughly 280–320mm. Lower risers with deeper goings feel relaxed and are easier for older legs and kids; taller risers with shallow goings feel steep and tiring. We aim for the gentler end outdoors, especially on entry steps that get a lot of traffic.
The Building Code and Australian Standards set out specific minimum and maximum dimensions for stairs, and these are not figures to guess at — your designer or builder will confirm the exact requirements for your situation. The two principles we never break, though, are:
- Consistency. Every riser in a flight must be the same height, and every going the same depth. Uneven steps are the classic cause of falls because the brain learns the rhythm after the first step.
- A clear nosing. The leading edge of each tread should be easy to see and grip, not rounded into a slippery lip.
For longer flights, a landing breaks the climb, gives a safe place to pause, and is essential where steps change direction. On a steep Hills path we will often stagger the steps into short runs separated by generous landings rather than building one intimidating staircase.
Footings and reinforcement so steps don't crack or settle
Concrete steps fail for the same reason most concrete fails: poor ground preparation and inadequate reinforcement. Because steps concentrate a lot of weight onto a small footprint, and often sit on cut-and-fill ground on a slope, the base preparation matters even more than it does for a flat slab.
We start by digging down to firm, undisturbed ground or properly compacted fill — never loose backfill that will settle and drop a corner. The steps are then tied into a footing at the base so the whole structure bears on stable ground. Reinforcement runs through the mass of the steps: steel bar and mesh placed to control cracking and to hold the steps together as one rigid unit. On steeper or taller sets we'll often dowel the steps into an adjoining footing, retaining wall or slab so nothing can slide or pull away.
Movement and shrinkage are the enemies of any concrete, and understanding why concrete cracks and how we prevent it is half the battle. Thickness through the treads and the supporting body of the steps needs to be right for the load, much like we plan for a driveway — our guide to thickness, slope and drainage explains the same principles that apply here. Skimping on depth or steel to save a little concrete is a false economy; rebuilding cracked steps costs far more than getting them right the first time.
Non-slip finishes — critical on shaded, wet Hills steps
For outdoor steps the finish is a safety feature, not just a look. A smooth, trowelled surface might suit an indoor floor, but outdoors — and especially on the damp, shaded steps so common under the trees in the Hills — it becomes lethally slippery with the first winter dew or moss. We always specify a textured, grippy finish on treads.
The main options we use are:
- Broom finish. The simplest and most reliable — a stiff broom dragged across fresh concrete to leave fine ridges. Run the broom across the direction of travel so the texture bites underfoot. It's economical, hard-wearing and easy to repair.
- Exposed aggregate. Washing back the surface to reveal the stone gives both excellent grip and a premium appearance. It's a favourite for entry steps that need to look the part — see our exposed aggregate work for what's achievable, and weigh up the trade-offs in our exposed aggregate cost guide.
- Grooves and tooled nosings. Forming shallow grooves near the leading edge of each tread, or a tooled non-slip strip, adds grip exactly where feet land and helps mark the step edge in low light.
Choosing the right surface is the same decision homeowners face for a driveway or path, and our post on choosing a driveway finish in the Adelaide Hills walks through the look-versus-grip trade-offs in more detail. If you want colour as well, it's worth a look at concrete driveway design ideas for SA for inspiration that carries straight across to steps and landings.
Handrails, edges and visibility
Anything more than a couple of steps generally needs a handrail, and on a flight beside a drop you'll also need protective balustrade — your builder will confirm where the rules require them. Even where they aren't strictly mandated, a well-anchored handrail makes steps usable for older residents and anyone carrying shopping. We cast in fixings or core-drill for posts so rails are bolted into solid concrete rather than fragile edges.
Edge detailing matters too. A slightly thickened, well-reinforced edge resists chipping, and a small contrasting strip or a different finish on the nosing helps people judge each step in poor light — a genuine safety win on shaded Hills entries that see early-morning and evening traffic.
Drainage: keep water off the treads
Steps must shed water, not collect it. Ponding on a tread is both a slip hazard in winter and an invitation for moss and surface breakdown over time. We build a very slight fall across each tread — just a millimetre or two per hundred — so water runs off the front edge rather than sitting in puddles.
On a sloping block we also think about where the water above the steps is going. Runoff from a path or driveway funnelling onto a flight will overwhelm it, so we direct that flow away with grading, a spoon drain or an ag-line before it ever reaches the steps. Tying the drainage of the steps into the broader site plan is part of doing the job properly, and it's the same thinking that protects a driveway from washout.
Formed-in-place versus precast steps
Formed-in-place (poured on site) and precast steps both have a place — the right choice depends on access, the look you want and how the steps tie into the rest of the work. Poured-in-place steps are formed up and cast exactly to your levels, so they fit the slope perfectly, integrate seamlessly with adjoining paths, slabs and walls, and can take any finish you like. This is what we do for most Hills jobs because no two blocks are the same.
Precast units are made off site and craned or carried into position. They can be quick where access allows and the geometry is simple, but they rarely match a custom slope as cleanly, the joins can be a weak point, and getting a large unit onto a tight or steep block is often more trouble than pouring in place. For anything that needs to marry up with a driveway, retaining wall or entry exactly, poured-in-place almost always wins.
Tying steps into paths, driveways and the whole job
Steps rarely stand alone. The best results come when the steps, the path or driveway above and below, and any retaining are planned together as one continuous surface. We dowel or tie the steps into adjoining slabs so they move as one, match the finishes for a clean look, and set the levels so there are no awkward trip lips where one element meets another. Where earthworks are involved — and on a sloping block they usually are — doing the cut, fill and the concrete as a single coordinated job saves money and avoids the headaches of one trade leaving a mess for the next.
Frequently asked questions
What's a comfortable step height?
For outdoor steps, a riser of around 130–170mm with a going (tread depth) of roughly 280–320mm feels comfortable for most people. Lower risers and deeper treads are easier on older legs and children. The golden rule is consistency — every step in a flight should be identical, because that's what your body learns to expect. Your builder will confirm the exact figures allowed under the Building Code for your situation.
What finish is best for non-slip outdoor steps?
A broom finish is the most reliable and economical non-slip surface, with the broom strokes run across the direction of travel. Exposed aggregate is the premium option, giving excellent grip and a high-end look. Tooled grooves near the nosing add extra traction where feet land. Avoid smooth, trowelled finishes outdoors — they become dangerously slippery once wet, which is a real risk on the shaded, damp steps common across the Hills.
Do concrete steps crack?
Properly built steps shouldn't develop structural cracks. The keys are firm ground or compacted fill, steel reinforcement running through the steps and into a base footing, adequate thickness, and good curing. Steps built on loose backfill or with too little steel are the ones that settle and crack. We cover the prevention principles in our article on why concrete cracks.
Talk to us about your steps
If you've got a tricky slope, an awkward entry or a set of tired old steps that have moved, we're happy to take a look. We've spent 25 years building steps, paths, driveways and retaining across the Hills and beyond, and we can plan the whole job so it ties together neatly. Get in touch through our contact page for honest advice and a quote.